Managing Projects
This procedure guide explains how to use the Projects tab to manage projects in your organization. The Projects tab allows administrators to create, edit, delete, and manage project details and user access.
Table of Contents
Section titled “Table of Contents”- Accessing the Projects Tab
- Understanding the Projects Table
- Creating New Projects
- Editing Projects
- Managing Project Users
- Deleting Projects
- Viewing Deleted Projects
- Filtering and Searching Projects
- Customizing Table View
- Key Features Summary
- Best Practices
- Troubleshooting
- Security Notes
Accessing the Projects Tab
Section titled “Accessing the Projects Tab”Step 1: Navigate to Admin Dashboard
Section titled “Step 1: Navigate to Admin Dashboard”- Log in to the application with admin privileges
- Navigate to the Admin Dashboard (typically accessible from the main navigation menu)
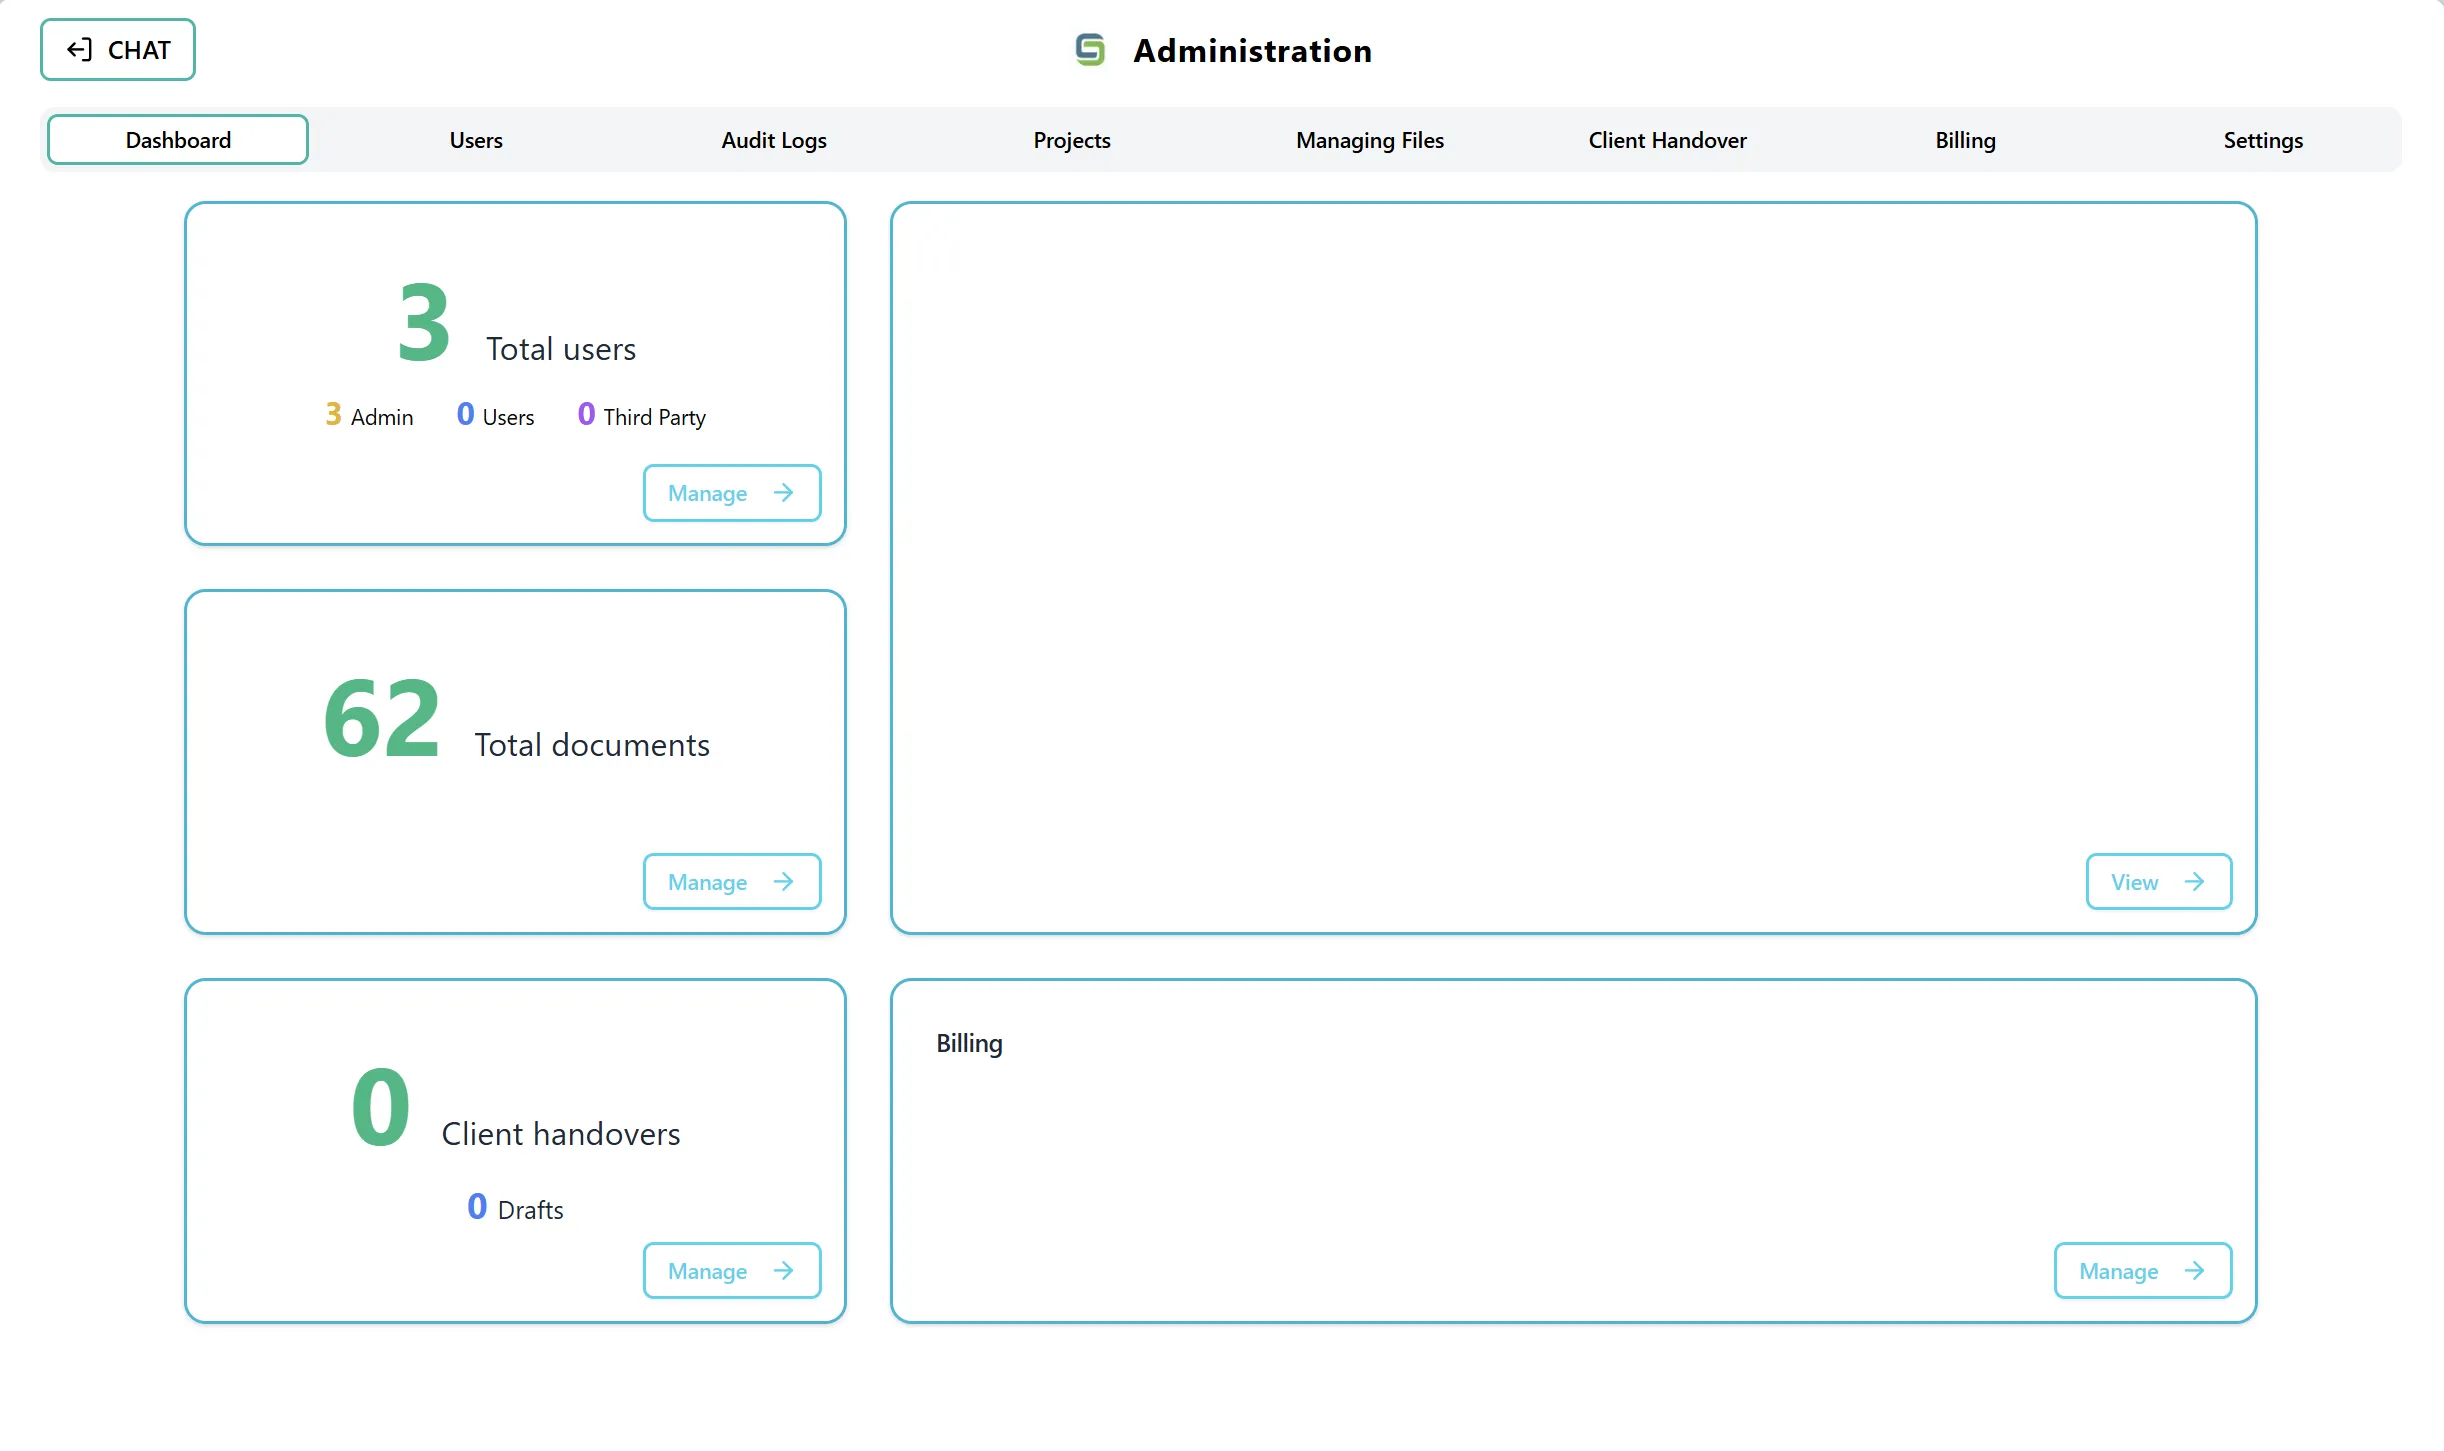
- The dashboard displays several cards showing statistics and quick access to different admin features
Step 2: Access the Projects Tab
Section titled “Step 2: Access the Projects Tab”You can access the Projects tab in two ways:
Option A: Using the Projects Card On the Admin Dashboard, you may see a card or section related to projects that displays project statistics.
Option B: Using the Navigation Tab You can directly select the “Projects” tab from the top navigation tabs in the Admin section. This tab is located alongside other admin sections such as Dashboard, Users, Audit Logs, Managing Files, Client Handover, and Settings.
Understanding the Projects Table
Section titled “Understanding the Projects Table”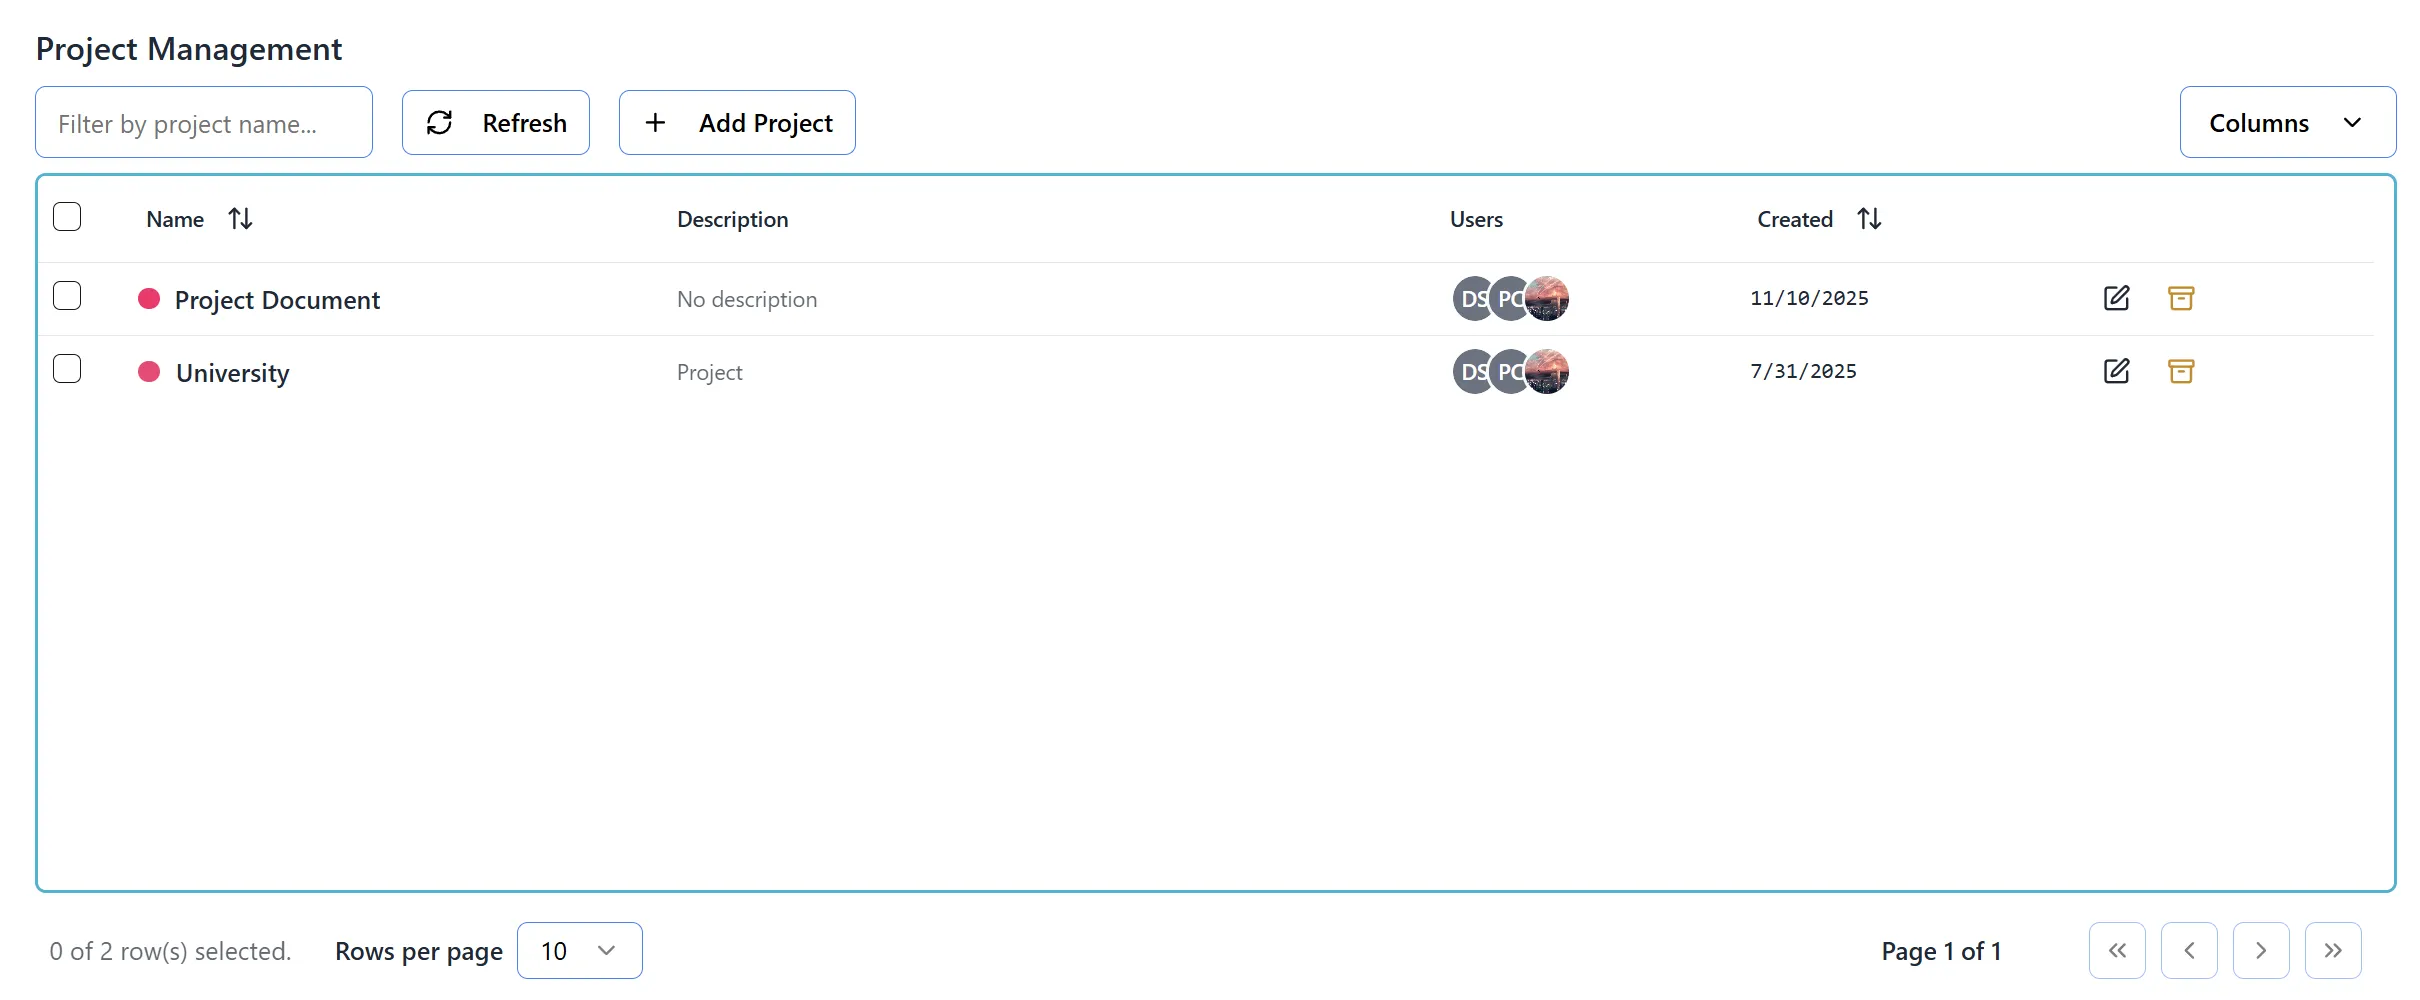
After accessing the Projects tab, you will see a comprehensive table displaying all projects in your organization:
Table Columns:
- Select: Checkbox to select individual projects or all projects on the page
- Name: Displays project name with a colored dot indicator showing the project color
- Description: Shows the project description (truncated if long)
- Users: Displays user avatars who have access to the project (up to 8 visible, with “+X more” indicator)
- Status: Shows whether the project is “Active” (green) or “Archived” (gray)
- Organization: Displays the organization name the project belongs to
- Created: Shows the project creation date
- Actions: Edit or Delete buttons
Top Controls:
- Filter by Project Name: Search box to filter projects by name
- Refresh Button: Updates the project list with the latest data
- Add Project Button: Opens the form to create a new project
- Columns Dropdown: Allows you to show/hide specific columns
- Bulk Action Buttons: Delete Selected (appears when projects are selected)
Creating New Projects
Section titled “Creating New Projects”Step 1: Open Add Project Form
Section titled “Step 1: Open Add Project Form”- Click the “Add Project” button (typically a ”+” icon or “Add Project” text button)
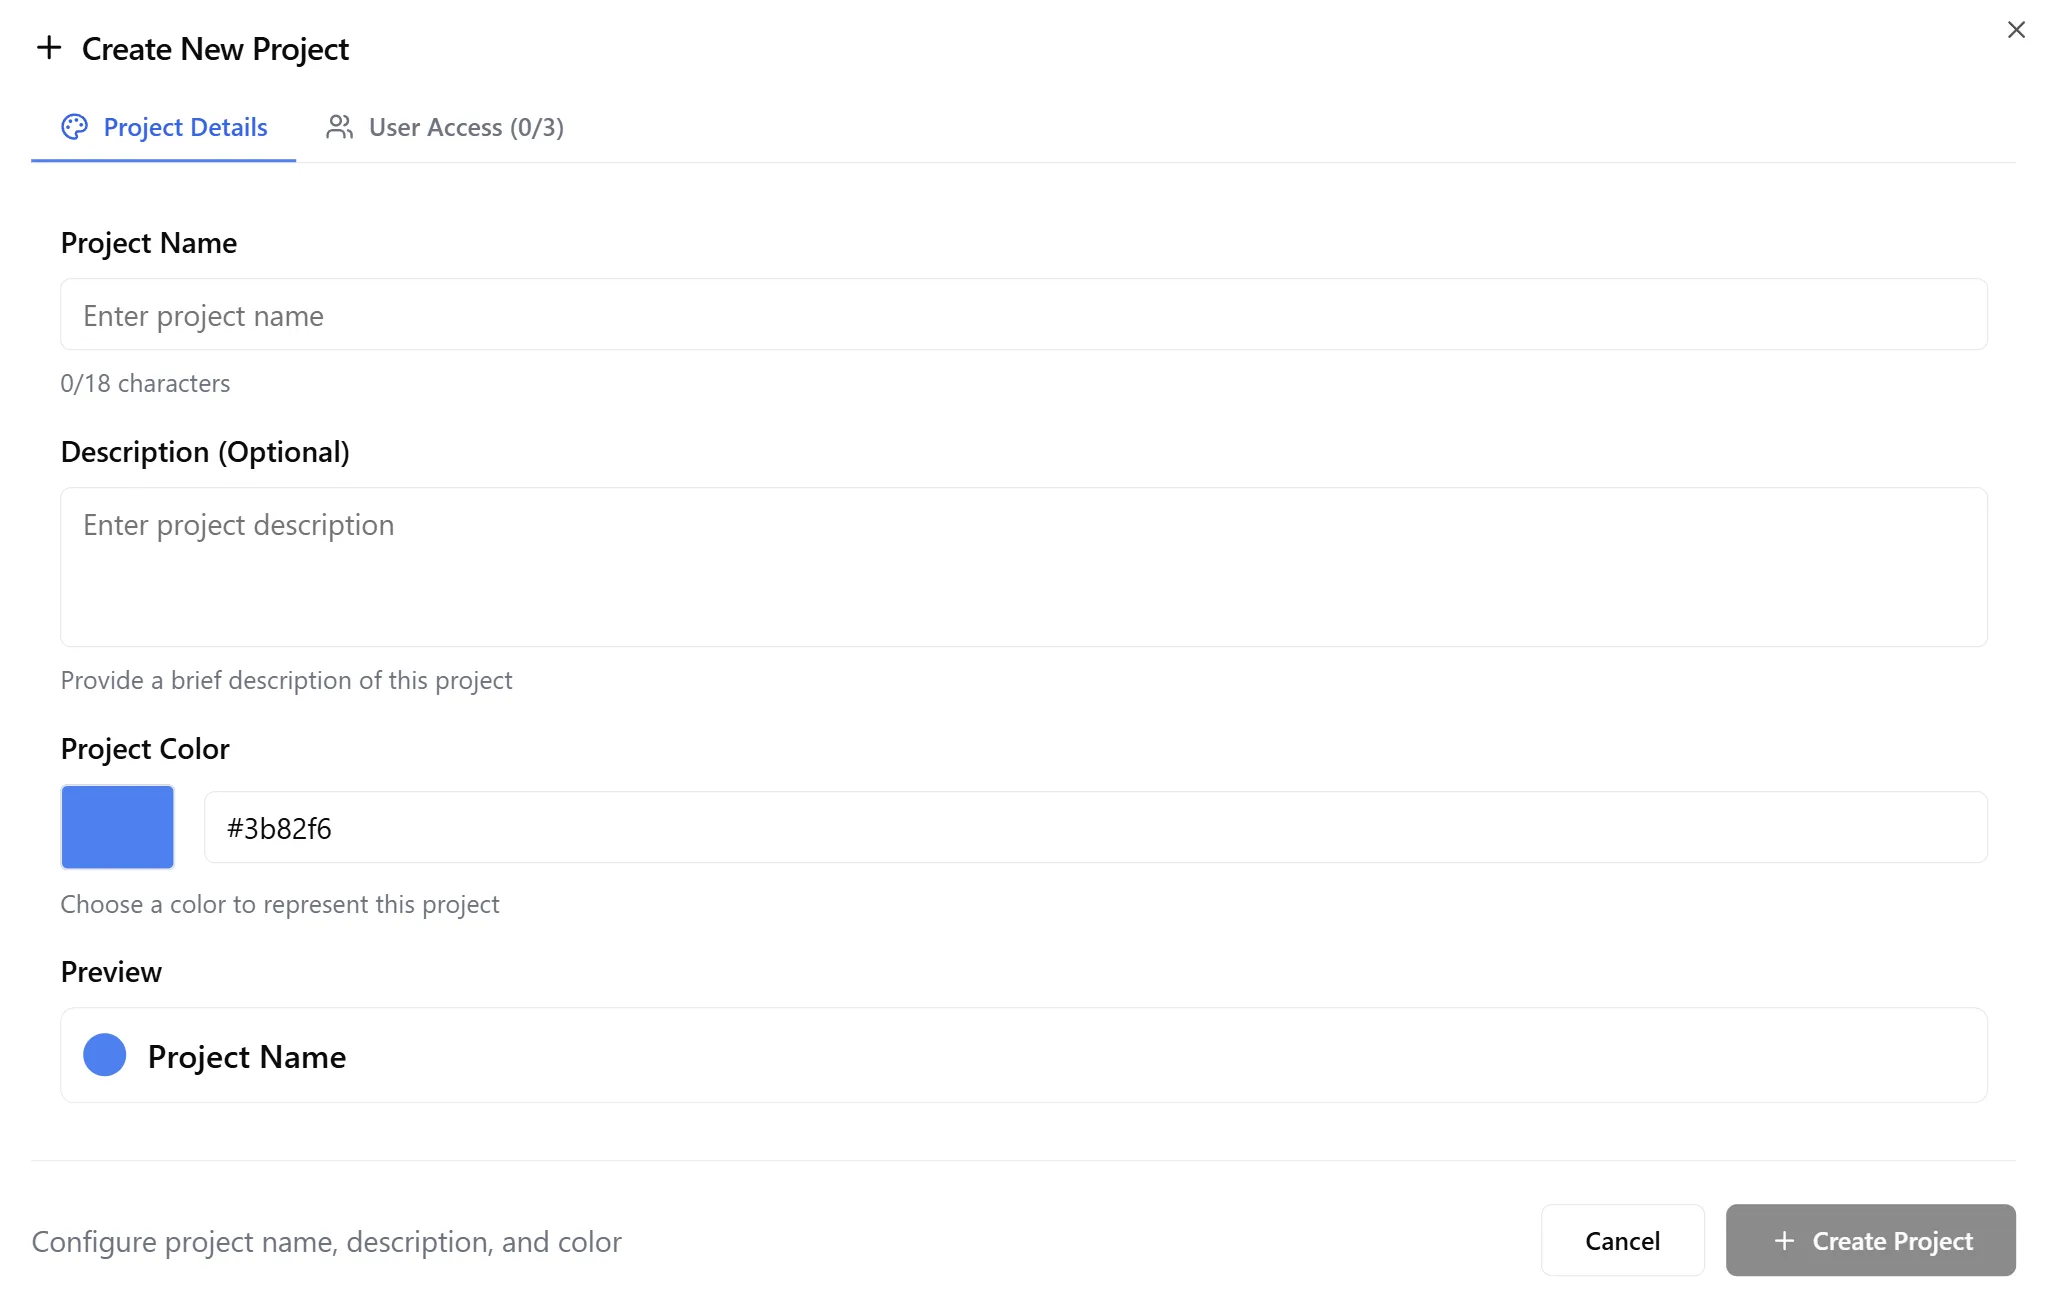
- An “Add New Project” form will appear above the table
Step 2: Enter Project Name
Section titled “Step 2: Enter Project Name”- In the “Project Name” field, enter a name for your project
- Important: Project names must be 18 characters or less
- A character counter shows “X/18” to help you stay within the limit
- The counter turns red if you exceed 18 characters
Step 3: Select Project Color
Section titled “Step 3: Select Project Color”- Click the color picker next to the “Color” label
- A color selection dialog will open
- Choose a color for your project
- The selected color will be displayed as a colored dot next to the project name
- Default color: Blue (#3b82f6) if no color is selected
Step 4: Create Project
Section titled “Step 4: Create Project”- Review the project name and color you’ve selected
- Click the “Add” button
- The system will:
- Create the project
- Automatically generate a description based on the project name
- Add the project to the table immediately
- Log the project creation in the audit trail
Step 5: Cancel Creation
Section titled “Step 5: Cancel Creation”- If you change your mind, click the “Cancel” button
- The form will close and no project will be created
Editing Projects
Section titled “Editing Projects”Step 1: Open Edit Project Modal
Section titled “Step 1: Open Edit Project Modal”- Locate the project you want to edit in the table
- Click the Edit button (pencil icon) in the Actions column
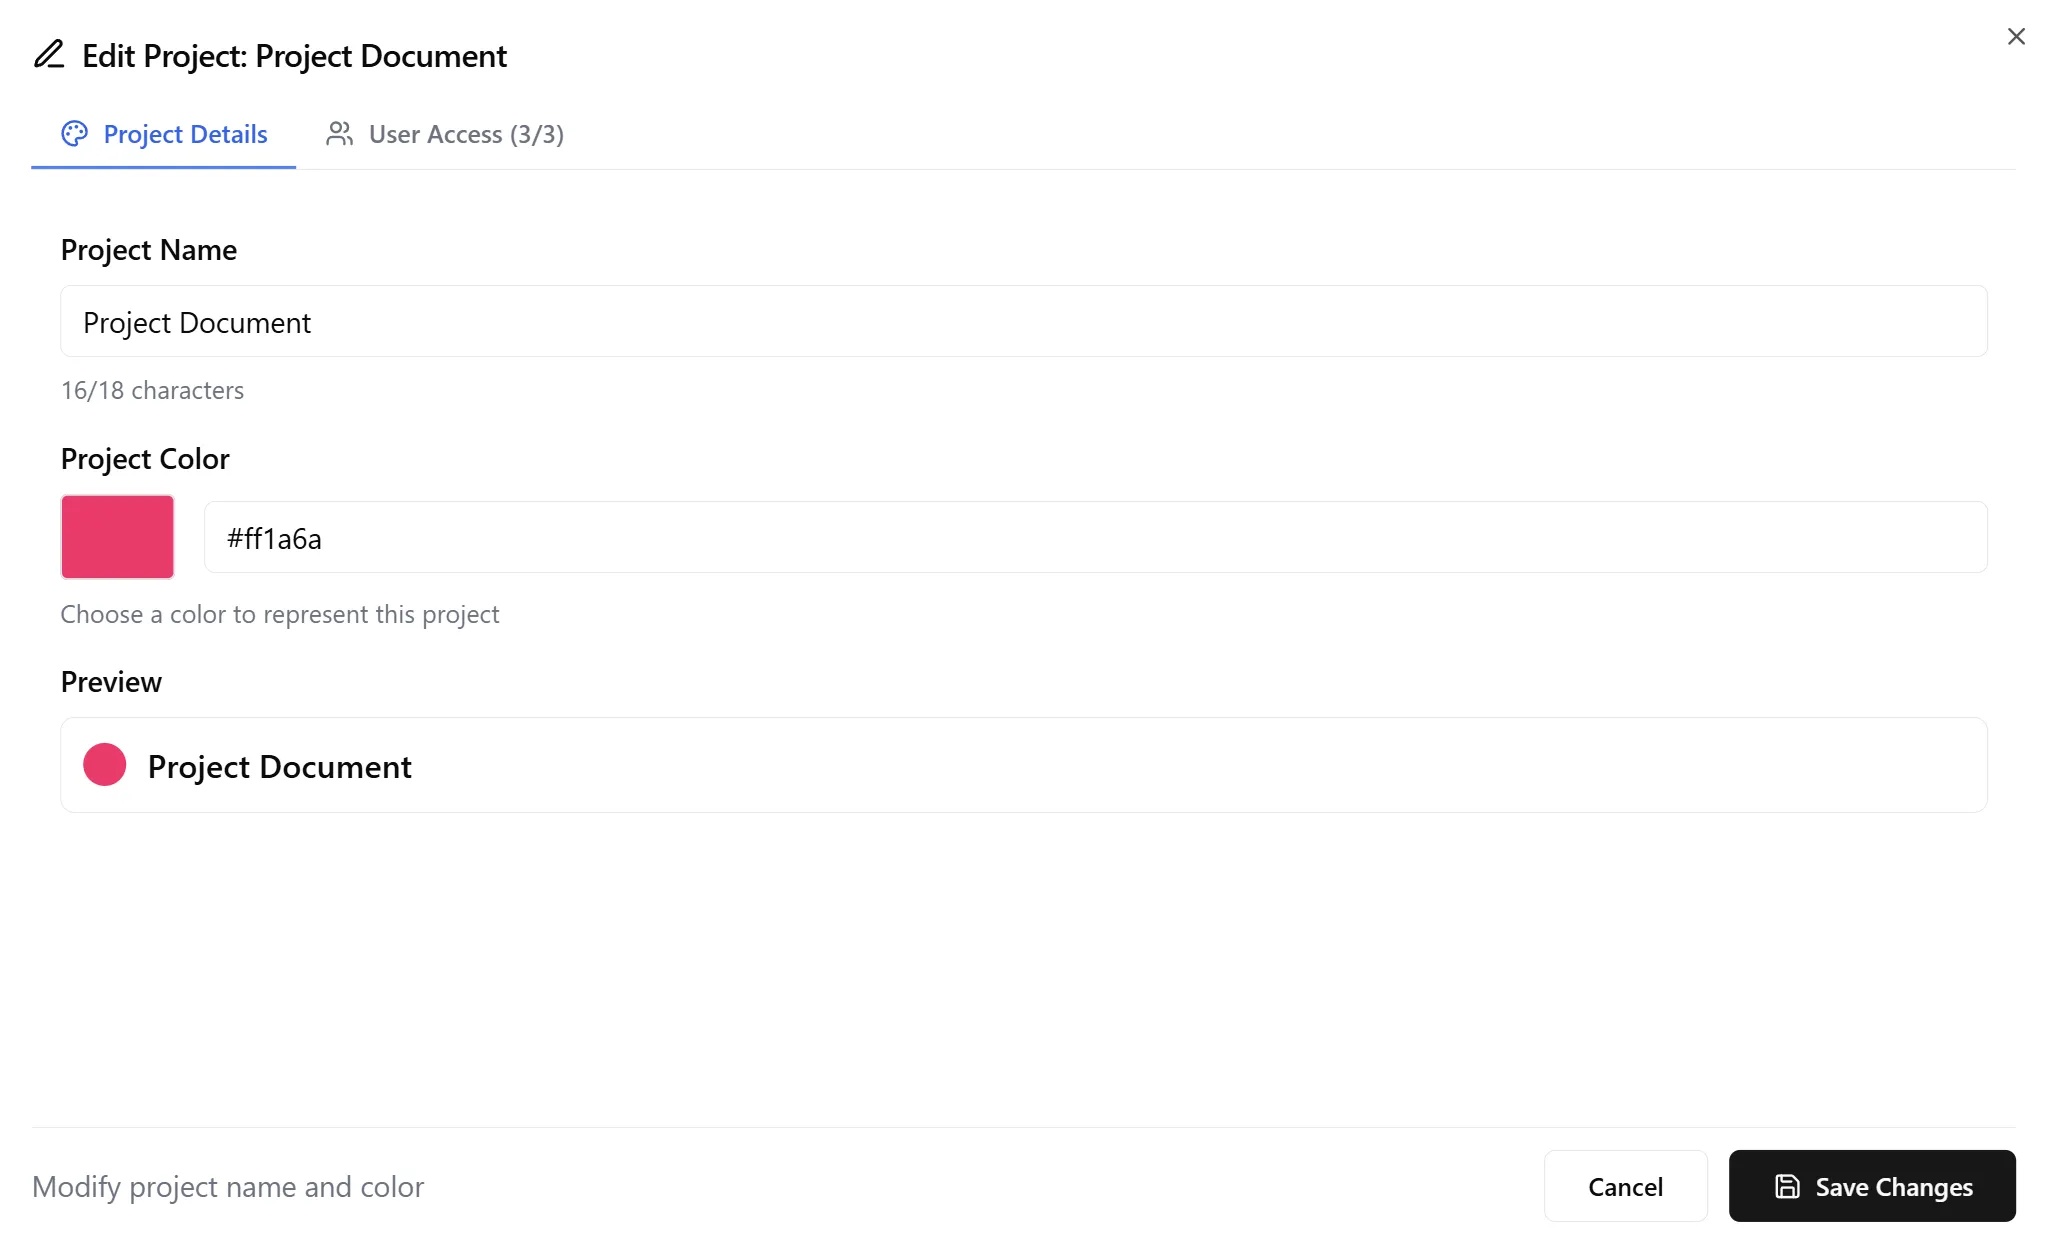
- The “Edit Project” modal will open with two tabs: “Details” and “Users”
Note: You can only edit active projects. Deleted projects cannot be edited.
Step 2: Edit Project Details (Details Tab)
Section titled “Step 2: Edit Project Details (Details Tab)”- The “Details” tab is selected by default
- You can modify:
- Project Name: Change the project name (max 18 characters)
- Color: Change the project color using the color picker
- Description: View or modify the project description (auto-generated but editable)
Step 3: Save Project Details
Section titled “Step 3: Save Project Details”- Make your changes to the project name, color, or description
- Click the “Save” button
- The changes will be applied immediately
- The project will be updated in the table
- Changes are logged in the audit trail
Step 4: Cancel Changes
Section titled “Step 4: Cancel Changes”- If you don’t want to save your changes, click “Cancel”
- The modal will close without applying any changes
Managing Project Users
Section titled “Managing Project Users”Step 1: Access Project Users
Section titled “Step 1: Access Project Users”You can access project users in two ways:
Method A: From the Edit Modal
- Click the Edit button (pencil icon) for a project
- Click the “Users” tab in the Edit Project modal
Method B: From the Users Column
- Click on the user avatars in the Users column
- The Edit Project modal will open directly to the **“Users” tab
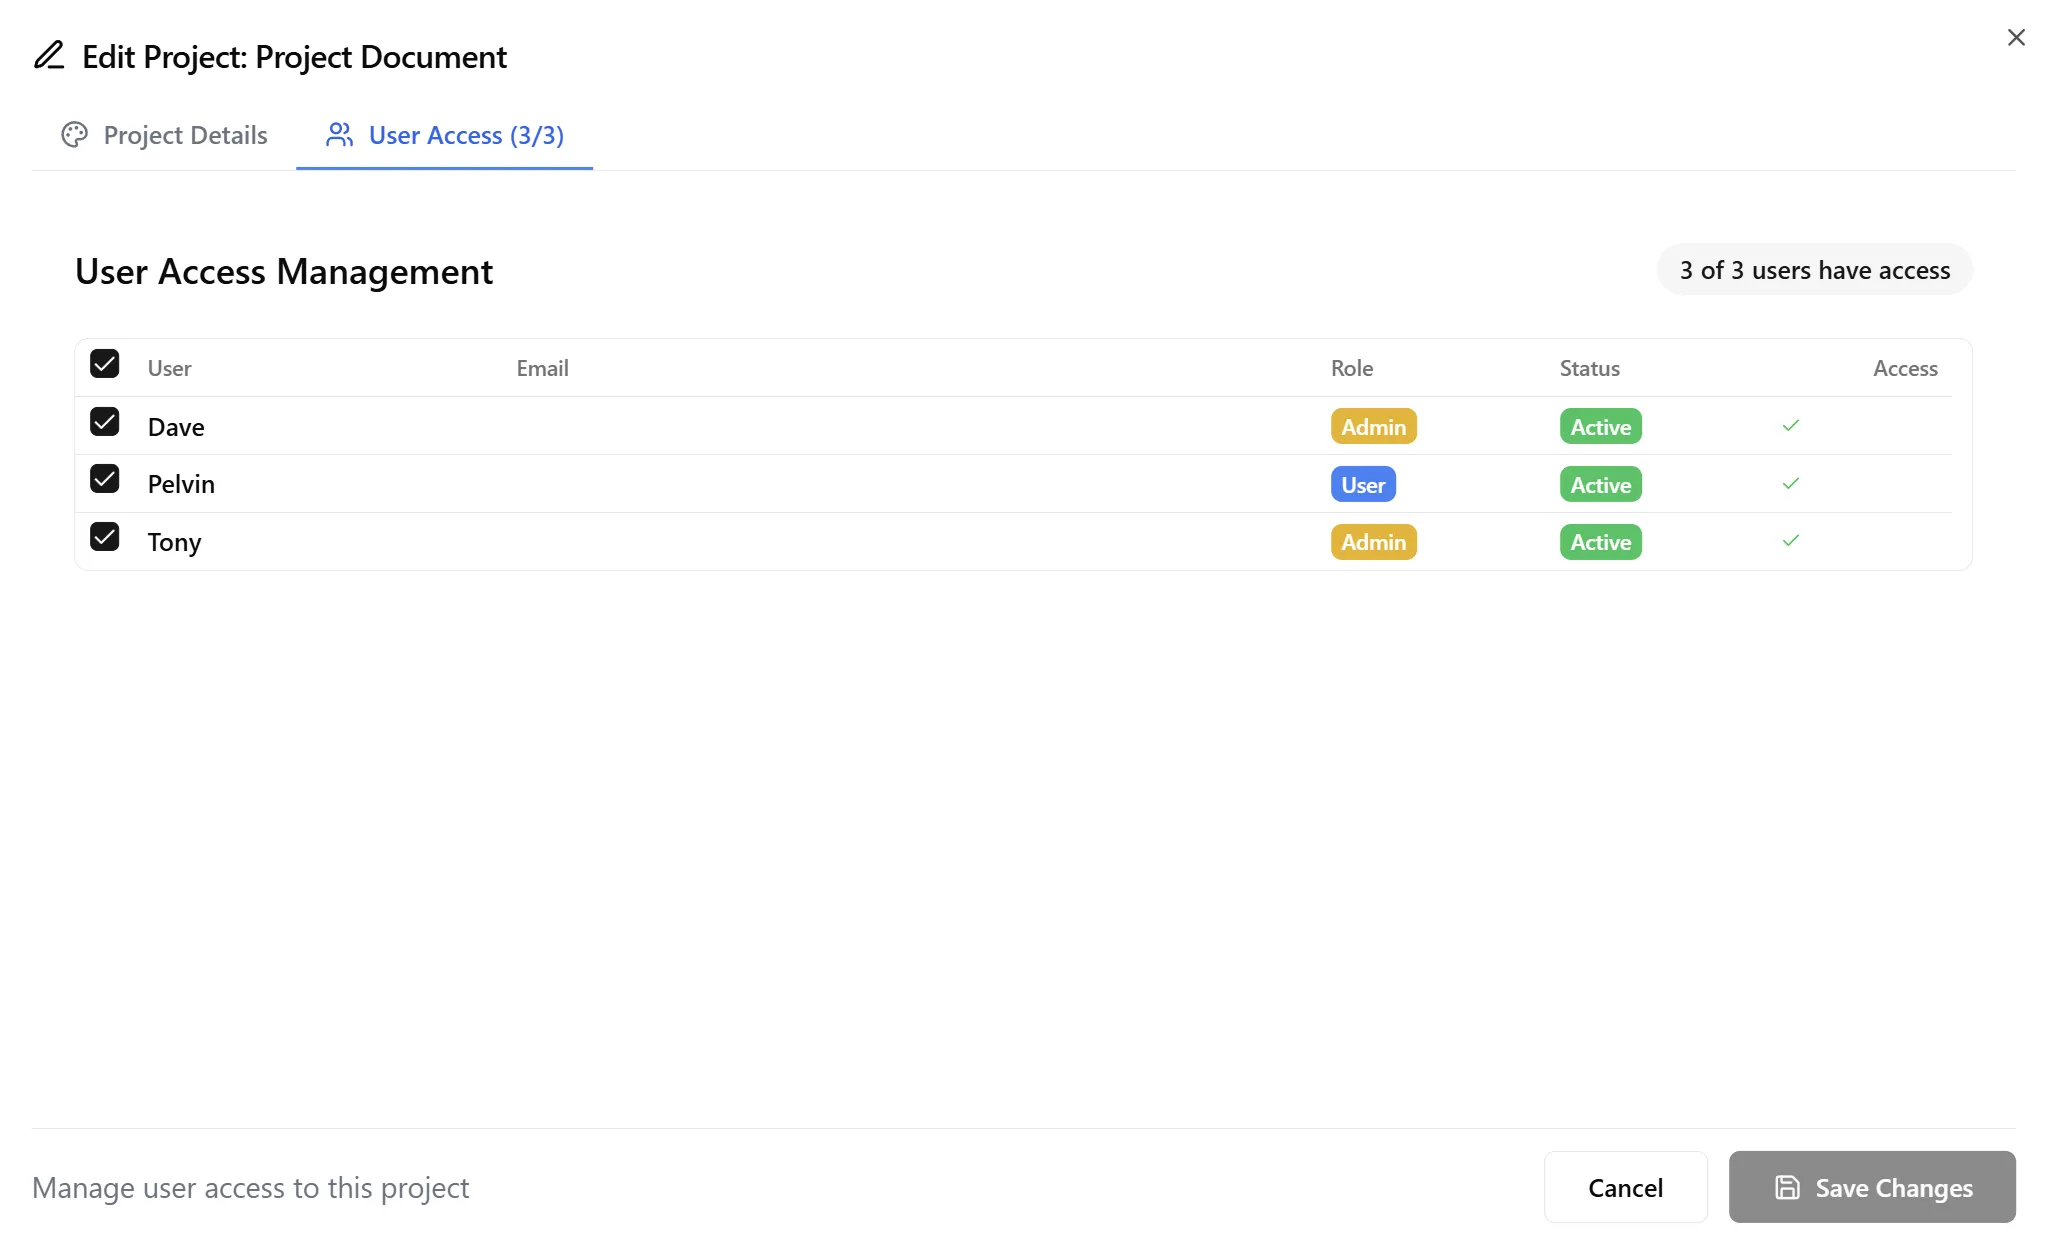
Step 2: View Current Users
Section titled “Step 2: View Current Users”The Users tab displays:
- List of all users in your organization
- Checkboxes indicating which users currently have access to the project
- User information: Name, email, and avatar for each user
Step 3: Grant User Access
Section titled “Step 3: Grant User Access”- Find the user you want to grant access to
- Check the checkbox next to their name
- The user will immediately have access to the project
- Changes are saved automatically
Step 4: Revoke User Access
Section titled “Step 4: Revoke User Access”- Find the user you want to remove access from
- Uncheck the checkbox next to their name
- The user will immediately lose access to the project
- Changes are saved automatically
Step 5: View User Count
Section titled “Step 5: View User Count”- The Users column in the main table shows:
- Up to 8 user avatars for users with access
- A “+X more” indicator if there are more than 8 users
- “No users” if no users have access
- Click on the user avatars to manage users
Deleting Projects
Section titled “Deleting Projects”Step 1: Delete a Single Project
Section titled “Step 1: Delete a Single Project”- Locate the project you want to delete in the table
- Click the Delete button (archive icon) in the Actions column
- A confirmation modal will appear
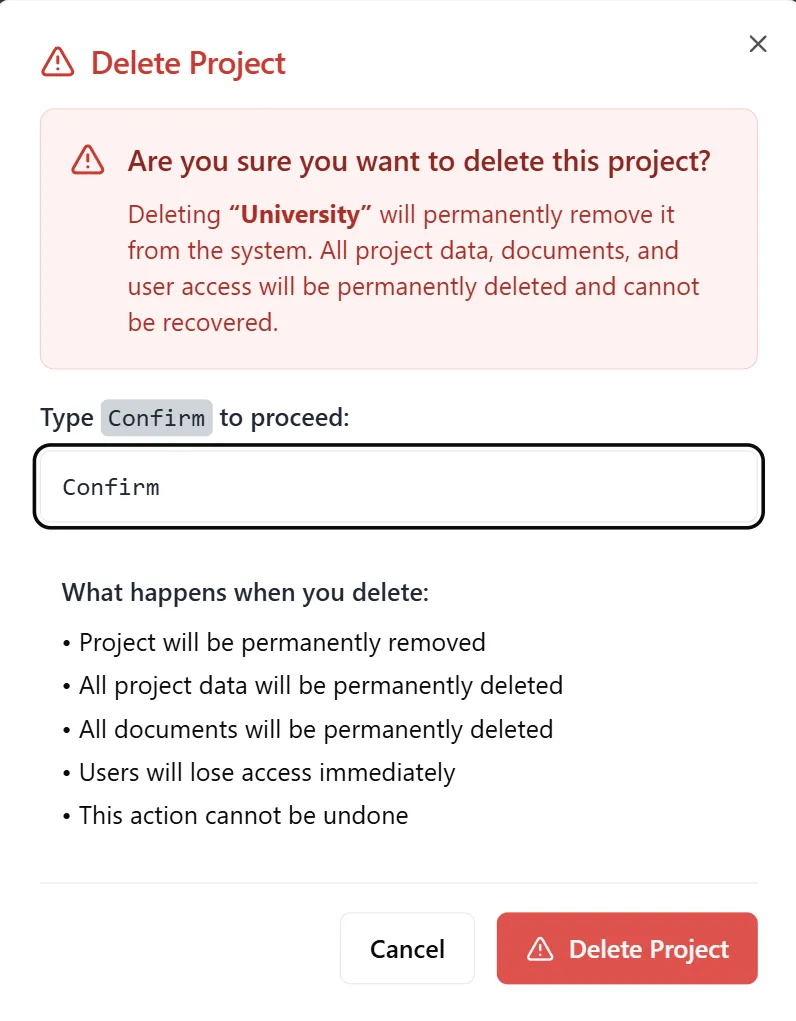
Step 2: Confirm Delete
Section titled “Step 2: Confirm Delete”- Review the project information in the confirmation modal
- The modal will display:
- Project name
- Warning about deletion
- Confirmation message
- Click “Delete” or “Confirm” to proceed
- The project will be:
- Marked as deleted
- Status changed to “Archived” (gray badge)
- Hidden from active project lists (depending on filters)
- Logged in the audit trail
Important: Deletion is permanent. Deleted projects cannot be restored.
Step 3: Delete Multiple Projects (Bulk Delete)
Section titled “Step 3: Delete Multiple Projects (Bulk Delete)”- Select projects by checking the checkboxes next to project names
- You can select multiple projects at once
- Once projects are selected, a “Delete Selected” button will appear
- Click the “Delete Selected” button
- All selected projects will be deleted
- A confirmation message may appear
- All selected projects will be deleted simultaneously
Viewing Deleted Projects
Section titled “Viewing Deleted Projects”Step 1: View Deleted Projects
Section titled “Step 1: View Deleted Projects”- Deleted projects will show “Archived” status in the Status column
- They remain visible in the table until you refresh the page
- After page refresh, deleted projects will no longer appear in the table
Step 2: Temporary Restore View
Section titled “Step 2: Temporary Restore View”- If you see a Restore button (rotate/restore icon) for a deleted project
- Clicking it will temporarily show the project as active in the current session
- Important: This is only a temporary view change
- After refreshing the page, the project will return to deleted status
- The restore action does not permanently restore the project
Note: There is no permanent restore functionality. Once a project is deleted, it cannot be permanently restored. The restore button only provides a temporary view until page refresh.
Filtering and Searching Projects
Section titled “Filtering and Searching Projects”Step 1: Filter by Project Name
Section titled “Step 1: Filter by Project Name”- Locate the “Filter by project name…” search box at the top-left of the table
- Type the project name (or part of it) you want to search for
- The table will automatically filter to show only matching projects
- The filter is case-insensitive and works in real-time
- Clear the search box to show all projects again
Step 2: Sort Columns
Section titled “Step 2: Sort Columns”- Click on any column header that has a sort icon (up/down arrows)
- Click once to sort in ascending order
- Click again to sort in descending order
- Click a third time to remove sorting
- Sortable columns include: Name, Status, Organization, and Created
Step 3: Filter by Status
Section titled “Step 3: Filter by Status”- You can manually identify deleted vs active projects by looking at the Status column
- Use sorting to group deleted or active projects together
- Deleted projects show a gray “Archived” badge
- Active projects show a green “Active” badge
- Note: After page refresh, deleted projects will no longer appear in the table
Customizing Table View
Section titled “Customizing Table View”Step 1: Show/Hide Columns
Section titled “Step 1: Show/Hide Columns”- Click the “Columns” dropdown button in the top-right area
- A dropdown menu will appear listing all available columns
- Check or uncheck columns to show or hide them
- The table will update immediately to reflect your changes
Step 2: Available Columns
Section titled “Step 2: Available Columns”You can toggle visibility for:
- Organization: Show/hide the organization column
- Status: Show/hide the archived status column (hidden by default)
- Created: Show/hide the creation date column
- Other optional columns as available
Step 3: Reset Column Visibility
Section titled “Step 3: Reset Column Visibility”- To show all columns again, check all boxes in the Columns dropdown
- To hide columns, simply uncheck them
Key Features Summary
Section titled “Key Features Summary”Project Management Features
Section titled “Project Management Features”- Create Projects: Add new projects with custom names and colors
- Edit Projects: Modify project details (name, color, description)
- Delete Projects: Permanently delete projects (marked as archived)
- Bulk Operations: Delete multiple projects at once
User Management Features
Section titled “User Management Features”- Grant Access: Add users to projects
- Revoke Access: Remove users from projects
- View Users: See all users with access to a project
- User Avatars: Visual representation of project users in the table
Organization Features
Section titled “Organization Features”- Project Colors: Color-code projects for easy identification
- Project Descriptions: Auto-generated or custom descriptions
- Filtering: Search and filter projects by name
- Sorting: Sort projects by various columns
Best Practices
Section titled “Best Practices”Before Creating Projects
Section titled “Before Creating Projects”- Plan Project Names: Keep names concise (18 characters max) and descriptive
- Choose Colors: Use distinct colors to differentiate projects visually
- Check Existing Projects: Use the filter to check if a similar project already exists
- Consider Organization: Ensure projects are created in the correct organization
When Managing Projects
Section titled “When Managing Projects”- Review Before Deleting: Verify you’re deleting the correct project (deletion is permanent)
- Update User Access: Regularly review and update project user access
- Use Descriptive Names: Keep project names clear and meaningful
- Delete Unused Projects: Delete projects that are no longer needed (cannot be restored)
Security Considerations
Section titled “Security Considerations”- User Access: Only grant project access to users who need it
- Regular Review: Periodically review project user lists
- Delete Sensitive Projects: Delete projects containing sensitive information when no longer needed (permanent action)
- Audit Trail: All project changes are logged in the audit trail
Troubleshooting
Section titled “Troubleshooting”Issue: Cannot Create Project - Name Too Long
Section titled “Issue: Cannot Create Project - Name Too Long”Solution:
- Project names must be 18 characters or less
- Shorten the project name
- The character counter will show red if you exceed the limit
Issue: Cannot Edit Deleted Project
Section titled “Issue: Cannot Edit Deleted Project”Solution:
- Deleted projects cannot be edited
- Deletion is permanent - projects cannot be restored
- If you need to make changes, you must create a new project
Issue: Users Not Appearing in Project
Section titled “Issue: Users Not Appearing in Project”Solutions:
- Verify the user has access by checking the Users tab in Edit Project modal
- Ensure the user account is active
- Check that you’re viewing the correct project
- Refresh the page to see latest user assignments
Issue: Bulk Operations Not Working
Section titled “Issue: Bulk Operations Not Working”Solutions:
- Ensure projects are selected (checkboxes are checked)
- Verify you have admin privileges
- Try selecting projects one at a time
- Refresh the page and try again
Issue: Filter Not Working
Section titled “Issue: Filter Not Working”Solutions:
- Clear the filter and try again
- Check for typos in the project name search
- Ensure the project name matches (case-insensitive)
- Refresh the page if the issue persists
Security Notes
Section titled “Security Notes”- Only users with admin privileges can access the Projects tab
- Project changes are logged in the audit trail
- User access to projects is controlled through the Users tab
- Deleted projects are permanently removed (marked as archived)
- Project deletion is permanent and cannot be undone
- The restore button only provides a temporary view until page refresh