Chat Histories Procedure Guide
This procedure guide explains how to use the Chat Histories feature to manage, search, and navigate through your conversation history. The Chat Histories sidebar provides a comprehensive interface for organizing chats, accessing favorites, searching conversations, and managing your chat collection.
Table of Contents
Section titled “Table of Contents”- Accessing Chat Histories
- Understanding the Chat Sidebar Interface
- Viewing Chat History
- Searching Chat Histories
- Managing Favorite Chats
- Creating New Chats
- Renaming Chats
- Deleting Chats
- Sharing Chats
- Filtering Chats by Project
- Using Auto-Scroll Feature
- Key Features Summary
- Best Practices
- Troubleshooting
- Security Notes
Accessing Chat Histories
Section titled “Accessing Chat Histories”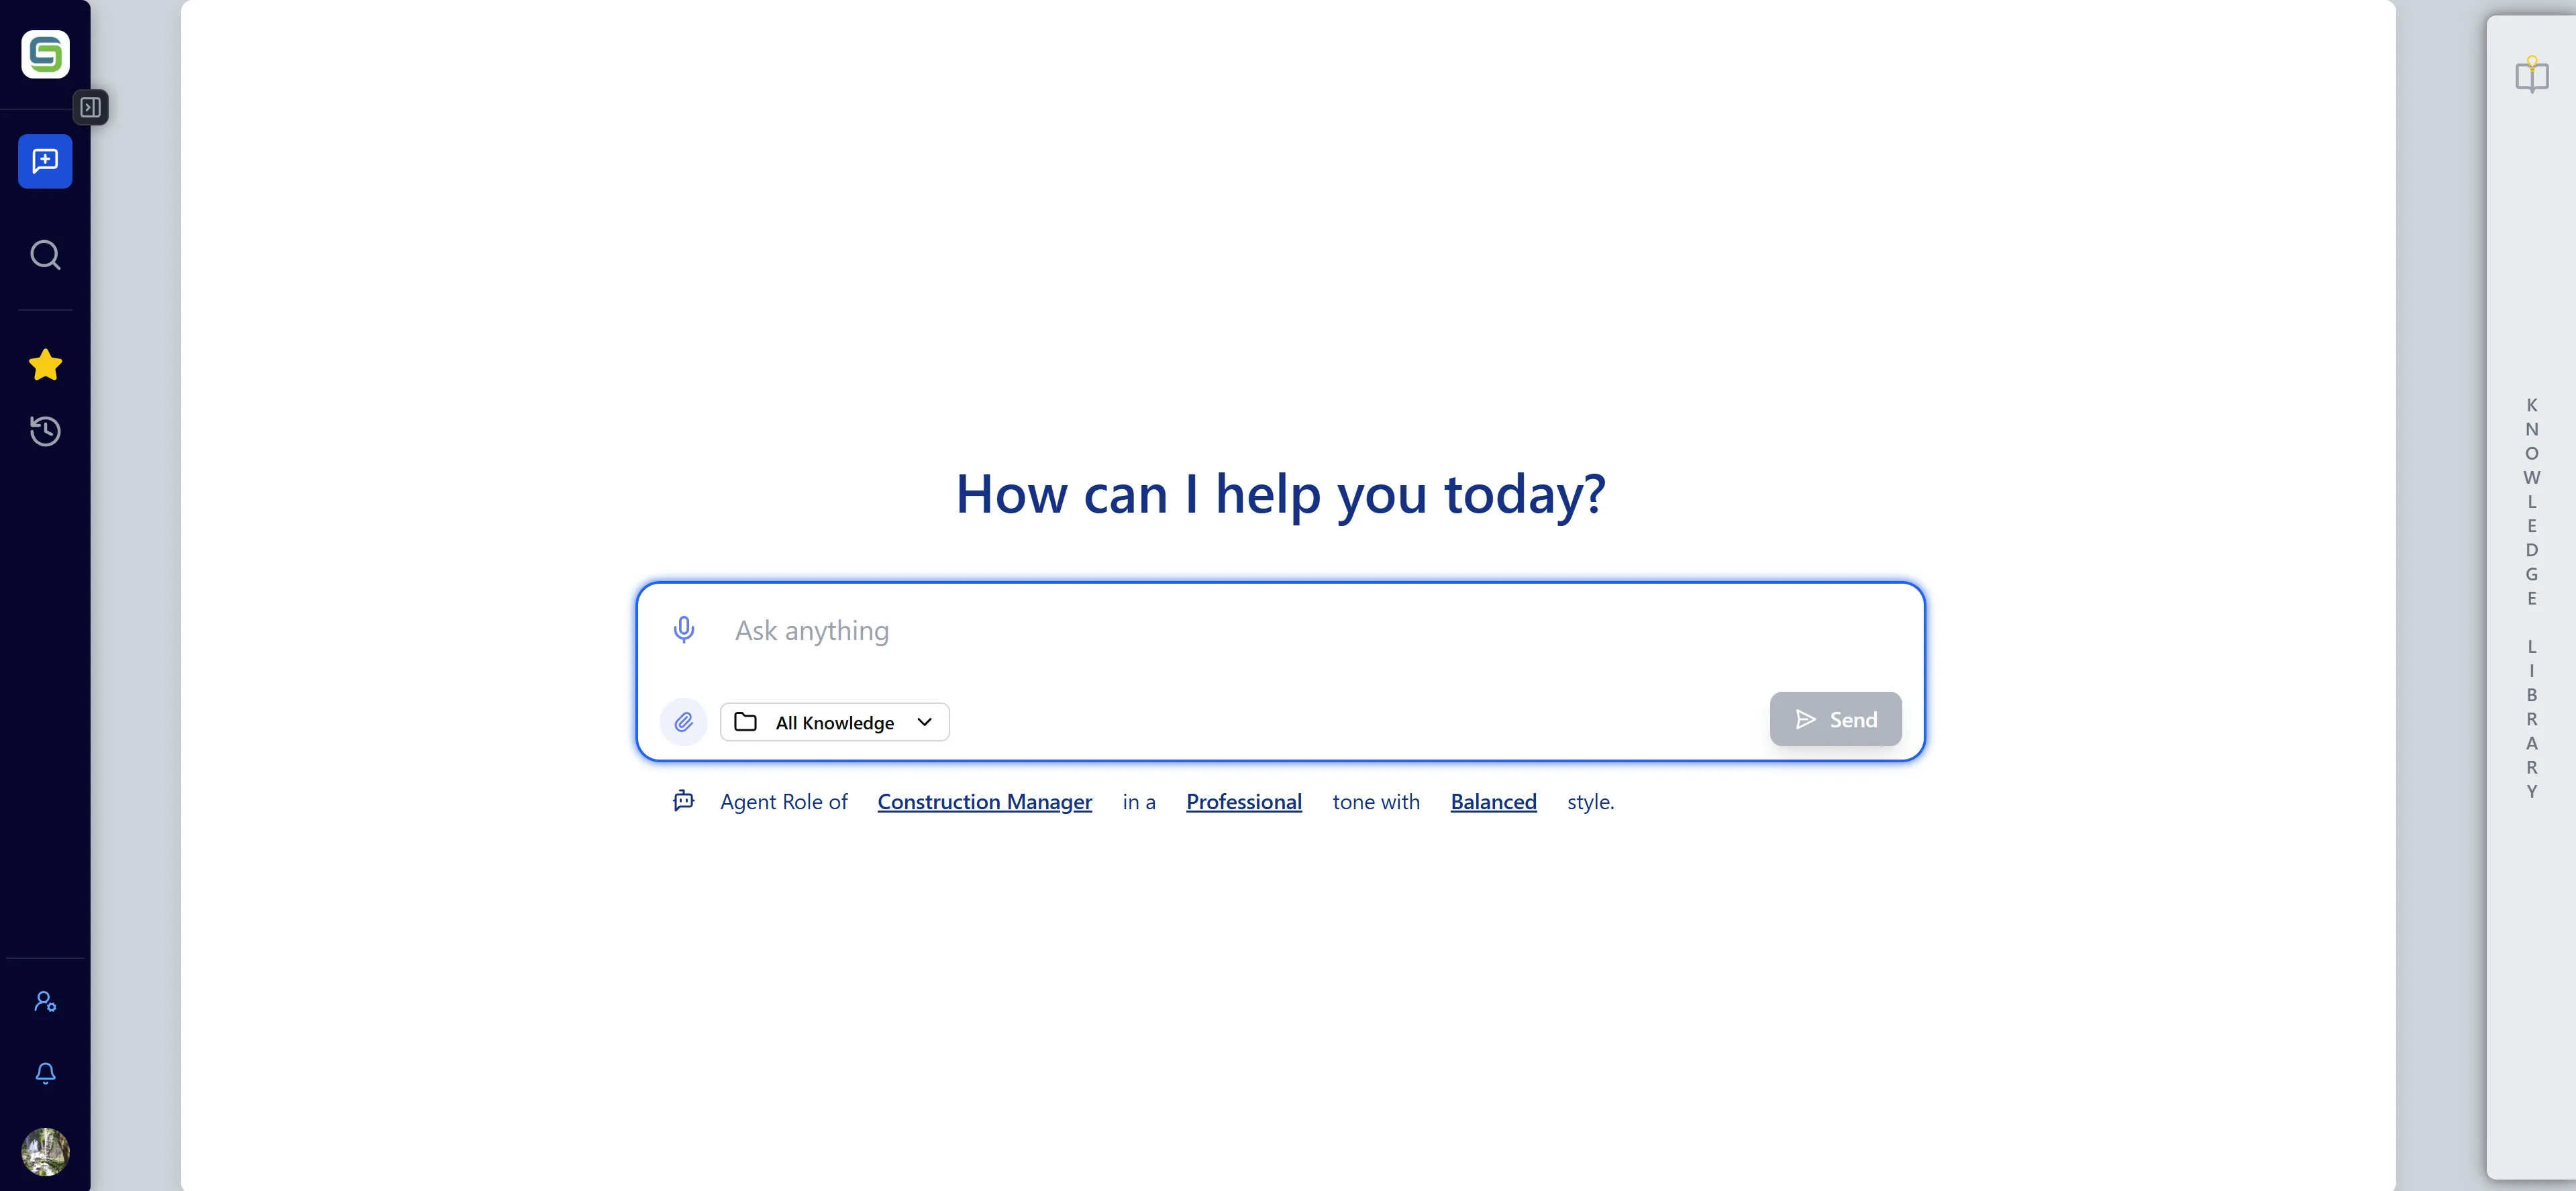
Step 1: Locate the Chat Sidebar
Section titled “Step 1: Locate the Chat Sidebar”- Log in to the application
- Navigate to the Chat interface
- The Chat Histories sidebar is located on the left side of the chat interface
- Look for the sidebar with the chat history list

Step 2: Understanding Sidebar States
Section titled “Step 2: Understanding Sidebar States”The Chat Sidebar has two states:
- Expanded: Shows full chat history with search, filters, and all controls
- Minimized: Shows a compact icon-only view for more screen space
Step 3: Toggle Sidebar Visibility
Section titled “Step 3: Toggle Sidebar Visibility”- Click the minimize/maximize button to collapse or expand the sidebar
- When minimized, hover over the sidebar icon to see a preview
- Click the icon again to expand the sidebar
Understanding the Chat Sidebar Interface
Section titled “Understanding the Chat Sidebar Interface”Header Section
Section titled “Header Section”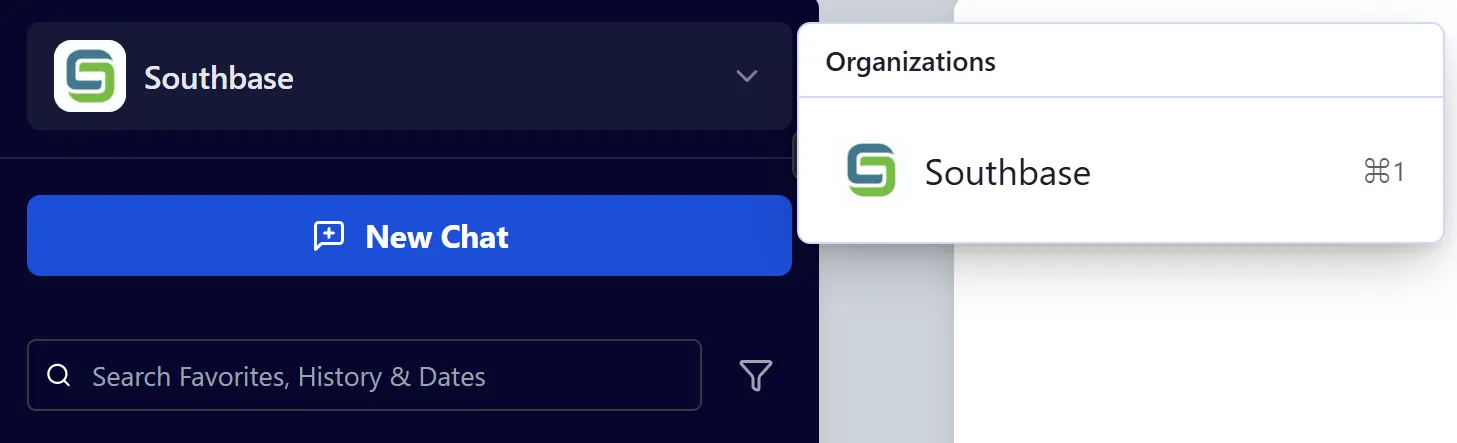
The header section contains:
- Organization Display: Shows current organization name and logo at the top
- New Chat Button: Prominent button to create a new conversation
- Search Bar: Search input for finding chats by name, content, or date
- Project Filter: Dropdown to filter chats by selected projects
Chat List Sections
Section titled “Chat List Sections”The sidebar is organized into two main sections:
-
Favorites Section:
- Displays chats you’ve marked as favorites
- Appears at the top of the sidebar
- Can be expanded or collapsed
- Shows a star icon (⭐) for each favorite
-
Chat History Section:
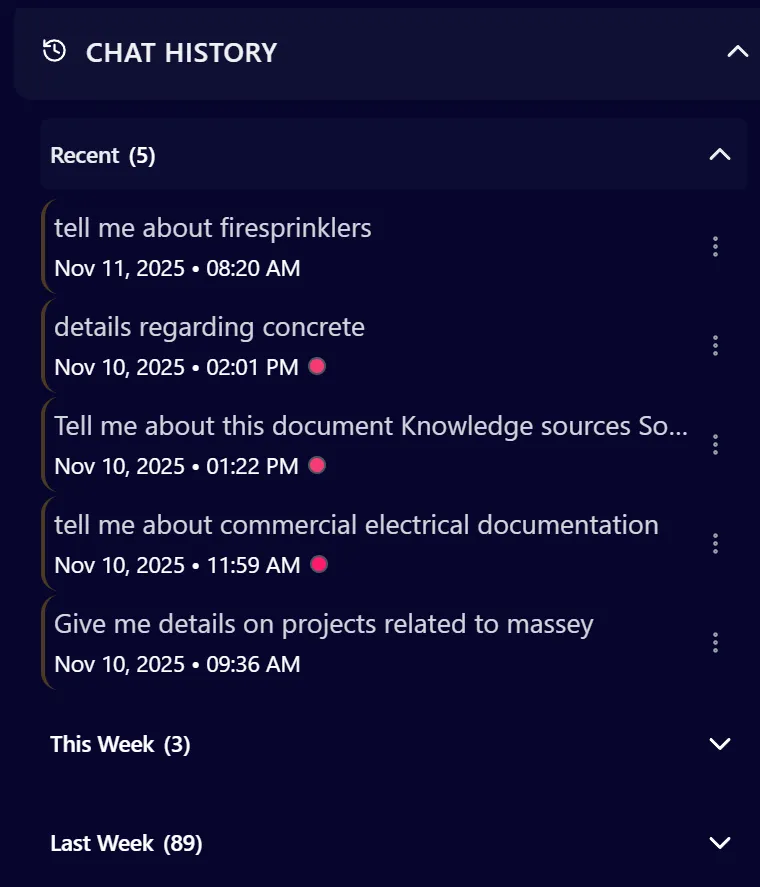
- Shows all your chats organized by date
- Grouped into date categories (Today, Yesterday, This Week, etc.)
- Each date group can be expanded or collapsed
- Shows chat name, date, and project indicators
Chat Item Display
Section titled “Chat Item Display”Each chat item shows:
- Chat Name: The title of the conversation (or “Untitled” if unnamed)
- Date/Time: Last updated date and time
- Project Indicators: Color-coded dots showing associated projects
- Star Icon: Indicates if the chat is favorited
- Dropdown Menu: Three-dot menu for additional actions
Viewing Chat History
Section titled “Viewing Chat History”Step 1: Browse Chat List
Section titled “Step 1: Browse Chat List”- Scroll through the chat history list in the sidebar
- Chats are organized by date groups:
- Today: Chats updated today
- Yesterday: Chats updated yesterday
- This Week: Chats from the past week
- This Month: Chats from the current month
- Older: Chats from previous months
Step 2: Expand Date Groups
Section titled “Step 2: Expand Date Groups”- Click on a date group header (e.g., “Today”, “This Week”)
- The group will expand to show all chats in that period
- Click again to collapse the group
- Multiple groups can be expanded simultaneously
Step 3: Select a Chat
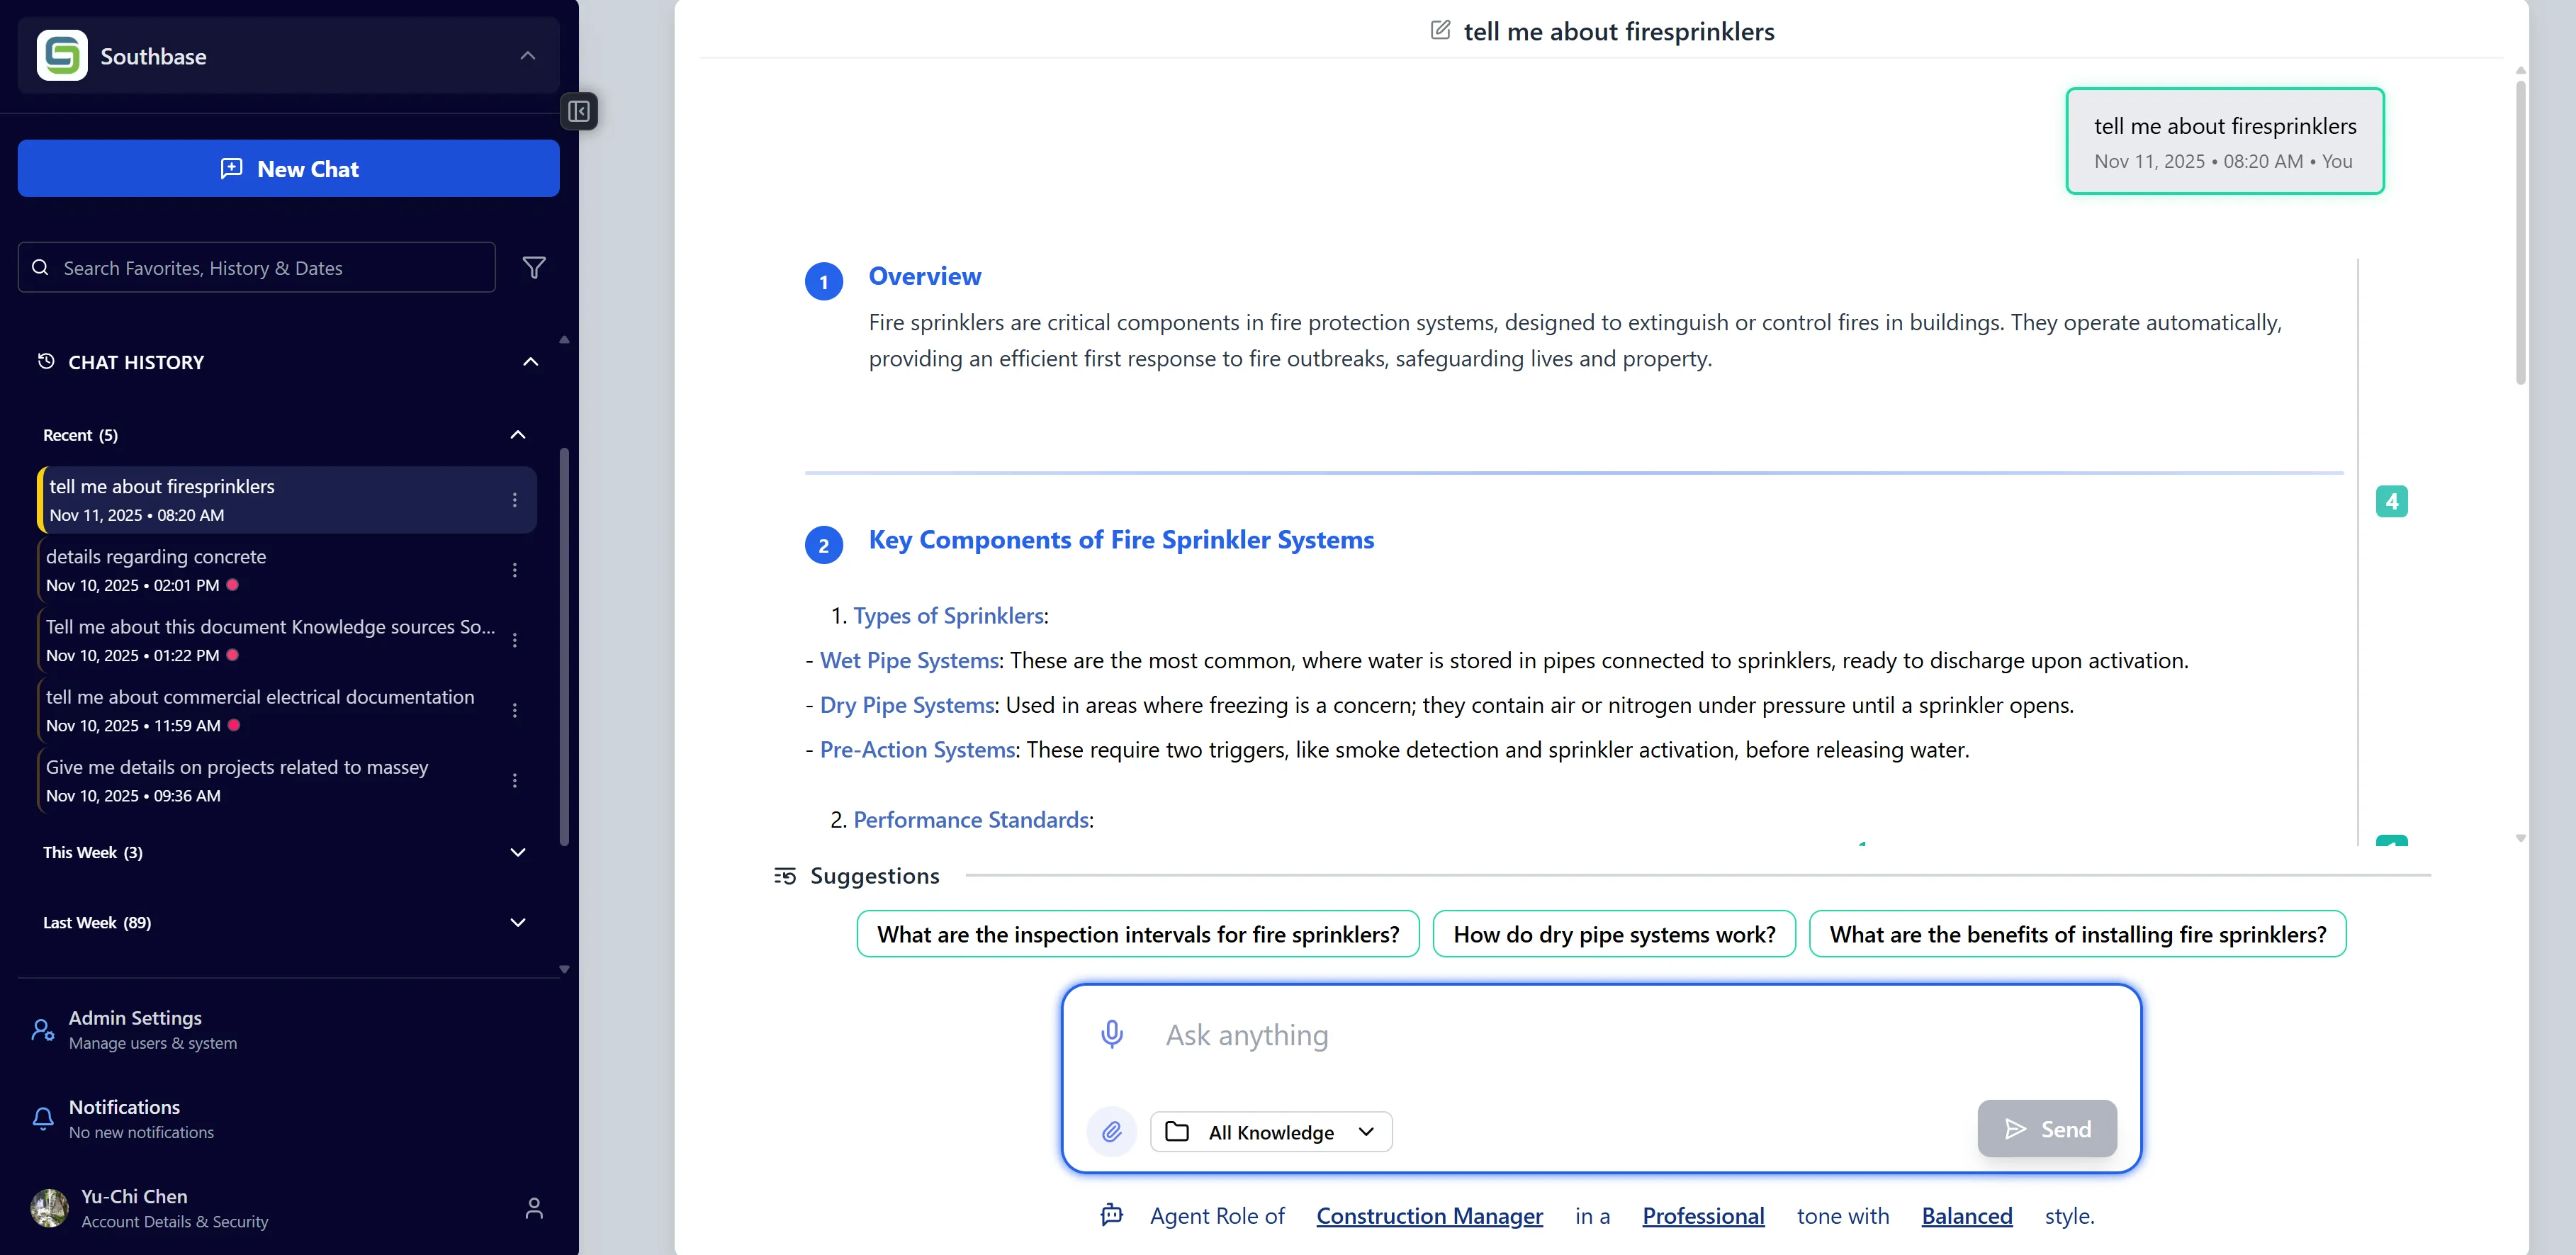
Section titled “Step 3: Select a Chat”- Click on any chat item in the list
- The chat will be highlighted with a yellow border
- The main chat panel will load the conversation
- The chat becomes the active conversation
Step 4: View Chat Details
Section titled “Step 4: View Chat Details”When a chat is selected, you can see:
- Chat Name: Full conversation title
- Last Updated: Date and time of last activity
- Project Associations: Which projects the chat is linked to
- Message Count: Number of messages in the conversation (if displayed)
Searching Chat Histories
Section titled “Searching Chat Histories”Step 1: Access Search Function
Section titled “Step 1: Access Search Function”- Locate the search bar at the top of the chat sidebar
- The search bar has a search icon on the left
- Placeholder text says: “Search Favorites, History & Dates”
- Click in the search input field to begin searching
Step 2: Enter Search Query
Section titled “Step 2: Enter Search Query”- Type your search terms in the search bar
- The search is case-insensitive and searches across:
- Chat Names: Conversation titles
- Chat Content: Messages within conversations
- Dates: Date and time information
- Results update in real-time as you type
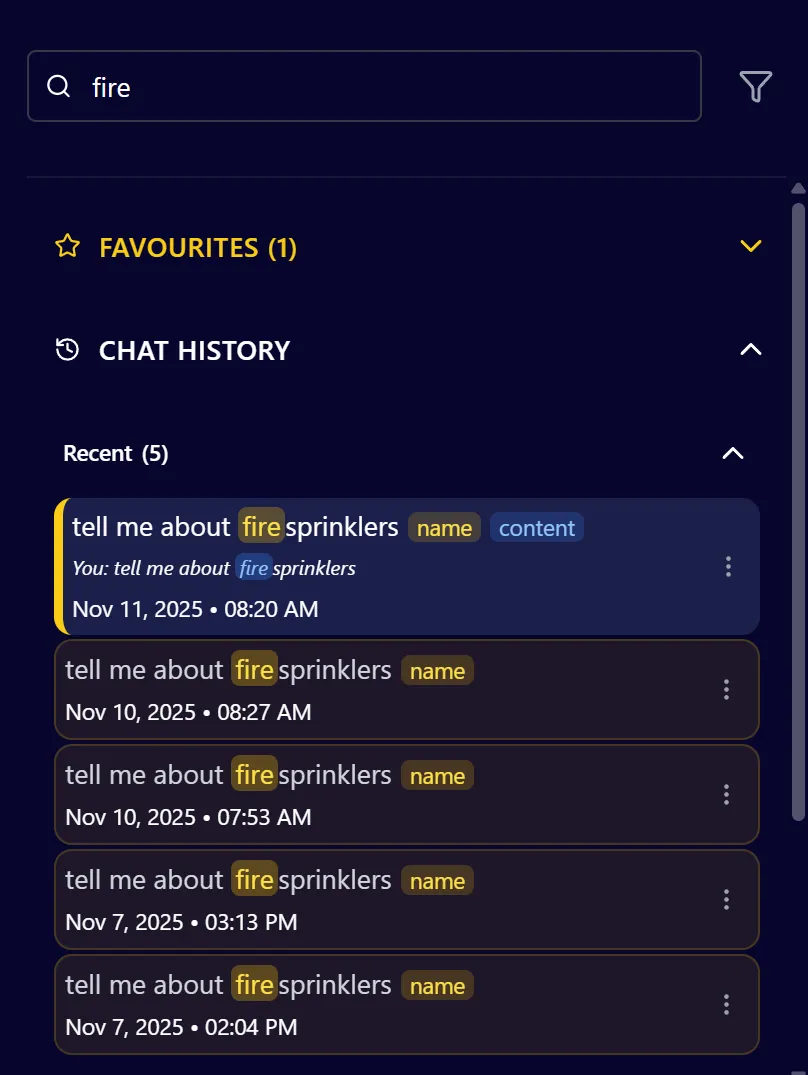
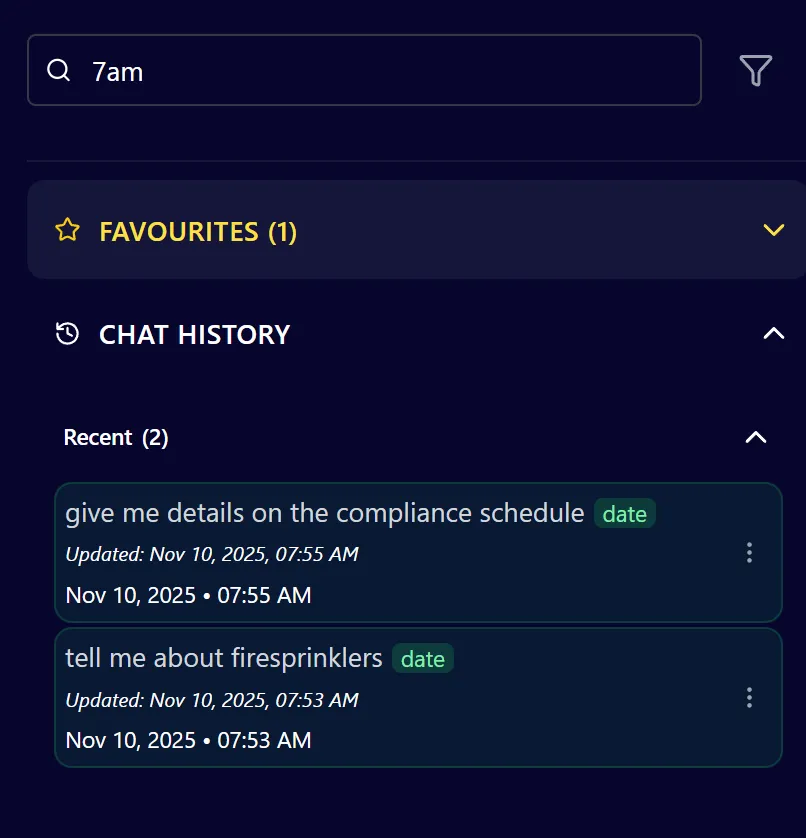
Step 3: Understand Search Results
Section titled “Step 3: Understand Search Results”Search results are highlighted with color-coded badges:
- Yellow Badge (“name”): Matches found in chat name
- Blue Badge (“content”): Matches found in message content
- Green Badge (“date”): Matches found in date/time information
Step 5: Clear Search
Section titled “Step 5: Clear Search”- Click the X icon in the search bar, or
- Delete all text from the search input
- The chat list will return to showing all chats
- Date groups will return to their normal state
Managing Favorite Chats
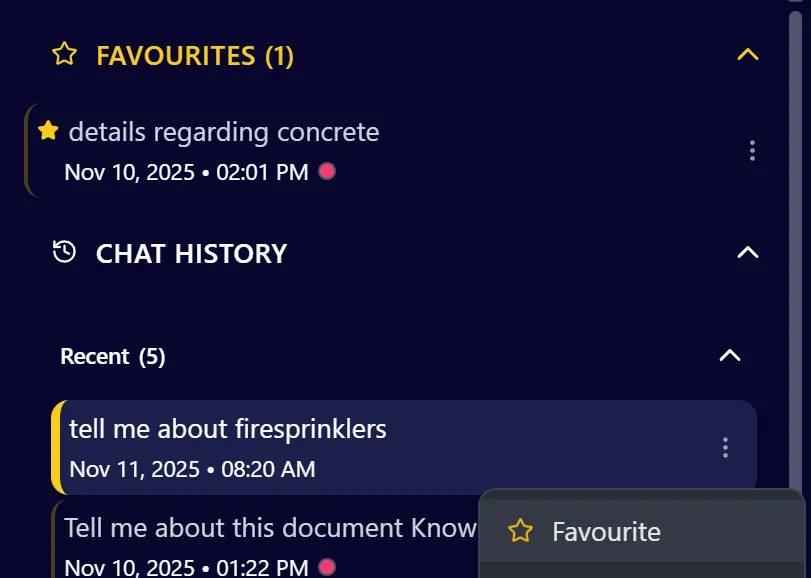
Section titled “Managing Favorite Chats”Step 1: Identify Favorite Chats
Section titled “Step 1: Identify Favorite Chats”- Favorite chats are displayed in the Favorites section at the top
- They show a filled star icon (⭐) next to the chat name
- Favorite chats appear in both the Favorites section and the main history
- The Favorites section can be expanded or collapsed
Step 2: Favorite a Chat
Section titled “Step 2: Favorite a Chat”- Hover over a chat in the history list
- Click the three-dot menu (⋮) that appears
- Select “Add to Favorites” or click the star icon if visible
- The chat will move to the Favorites section
- A filled star (⭐) will appear next to the chat name
Step 3: Unfavorite a Chat
Section titled “Step 3: Unfavorite a Chat”- Click the three-dot menu (⋮) on a favorited chat
- Select “Remove from Favorites” or click the filled star
- The chat will be removed from the Favorites section
- It will still appear in the main chat history
- The star will become unfilled (☆)
Step 4: Access Favorite Chats Quickly
Section titled “Step 4: Access Favorite Chats Quickly”- Scroll to the top of the sidebar
- The Favorites section is always visible at the top
- Click on any favorite to quickly open it
- Favorites are sorted by most recently updated
Creating New Chats
Section titled “Creating New Chats”Step 1: Access New Chat Button
Section titled “Step 1: Access New Chat Button”- Locate the “New Chat” button in the chat sidebar header
- The button is prominently displayed with a message icon
- It’s located below the organization display and above the search bar
Step 2: Create a New Chat
Section titled “Step 2: Create a New Chat”- Click the “New Chat” button
- A new chat will be created immediately
- The new chat will appear at the top of the “Today” group
- The chat panel will switch to the new conversation
- The chat will be named automatically based on your first message
Step 3: New Chat Behavior
Section titled “Step 3: New Chat Behavior”When a new chat is created:
- It appears in the chat history list
- It’s automatically selected and becomes the active chat
- The chat input is ready for your first message
- Project associations are based on your current project selection
- The chat name will be auto-generated after your first message
Renaming Chats
Section titled “Renaming Chats”Step 1: Access Rename Option
Section titled “Step 1: Access Rename Option”- Hover over a chat in the history list
- Click the three-dot menu (⋮) that appears
- Select “Rename” from the dropdown menu
Step 2: Edit Chat Name
Section titled “Step 2: Edit Chat Name”- After clicking “Rename”, the chat name becomes an editable input field
- The input field is highlighted with a blue border
- The current chat name is pre-filled
- Click in the input field to edit

Step 3: Save New Name
Section titled “Step 3: Save New Name”- Type the new chat name in the input field
- Press Enter to save the new name, or
- Click outside the input field to save (blur event)
- The chat name will update immediately in the sidebar
- If you leave the field empty, the rename will be cancelled
Step 4: Cancel Rename
Section titled “Step 4: Cancel Rename”- Press Escape key to cancel the rename operation
- The chat name will revert to its original name
- No changes will be saved
Deleting Chats
Section titled “Deleting Chats”Step 1: Access Delete Option
Section titled “Step 1: Access Delete Option”- Hover over a chat in the history list
- Click the three-dot menu (⋮) that appears
- Select “Delete” from the dropdown menu
Sharing Chats
Section titled “Sharing Chats”Step 1: Access Share Option
Section titled “Step 1: Access Share Option”- Hover over a chat in the history list
- Click the three-dot menu (⋮) that appears
- Select “Share” from the dropdown menu
Currently Work in progress
Section titled “Currently Work in progress”Filtering Chats by Project
Section titled “Filtering Chats by Project”Step 1: Access Project Filter
Section titled “Step 1: Access Project Filter”- Locate the Project Selector in the chat sidebar header
- It’s located next to the search bar
- Click on the project filter button to open the selector
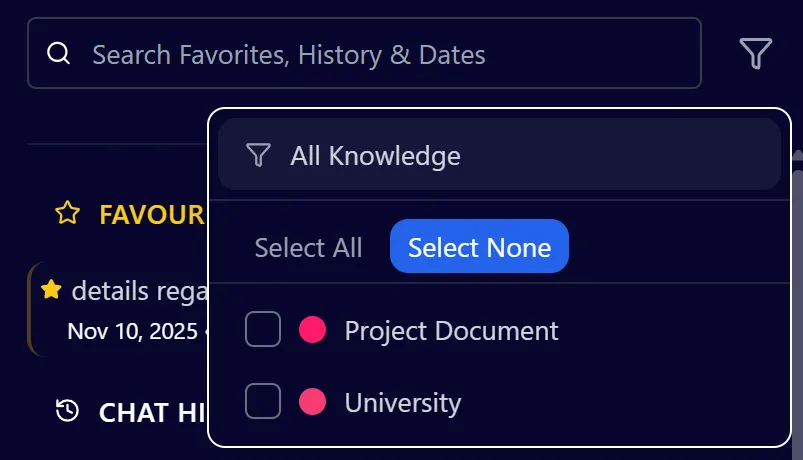
Step 2: Select Projects
Section titled “Step 2: Select Projects”- The project selector shows all available projects
- Select one or more projects from the list
- Projects are displayed with their color indicators
- You can select multiple projects simultaneously
Step 3: View Filtered Chats
Section titled “Step 3: View Filtered Chats”- After selecting projects, the chat list updates
- Only chats associated with selected projects are shown
- Chats may be associated with multiple projects
- Project color indicators appear next to each chat
Step 4: Clear Project Filter
Section titled “Step 4: Clear Project Filter”- Deselect all projects in the project selector, or
- Click “Clear” or “All Projects” option
- The chat list will return to showing all chats
- All chats will be visible regardless of project association
Using Auto-Scroll Feature
Section titled “Using Auto-Scroll Feature”Step 1: Understand Auto-Scroll
Section titled “Step 1: Understand Auto-Scroll”The auto-scroll feature automatically scrolls to the bottom of a chat when new messages arrive. This is useful for:
- Following active conversations
- Seeing the latest AI responses immediately
- Keeping up with real-time updates
Step 2: Enable Auto-Scroll
Section titled “Step 2: Enable Auto-Scroll”- Hover over a chat in the history list
- Click the three-dot menu (⋮)
- Select “Enable Auto-Scroll” from the menu
- The feature will be enabled for that specific chat
Step 3: Disable Auto-Scroll
Section titled “Step 3: Disable Auto-Scroll”- Hover over a chat with auto-scroll enabled
- Click the three-dot menu (⋮)
- Select “Disable Auto-Scroll” from the menu
- The chat will no longer auto-scroll to new messages
Step 4: Auto-Scroll Behavior
Section titled “Step 4: Auto-Scroll Behavior”When auto-scroll is enabled:
- The chat automatically scrolls to the bottom when new messages arrive
- This happens for both user messages and AI responses
- Manual scrolling disables auto-scroll temporarily
- Auto-scroll re-enables when you scroll back to the bottom
Key Features Summary
Section titled “Key Features Summary”Chat Management Features
Section titled “Chat Management Features”- Comprehensive History: All conversations organized chronologically
- Favorites System: Quick access to important chats
- Real-time Search: Find chats by name, content, or date
- Project Filtering: Filter chats by associated projects
- Date Grouping: Organize chats by time periods
- Chat Actions: Rename, delete, share, and favorite chats
- Auto-Scroll: Automatic scrolling for active conversations
Navigation Features
Section titled “Navigation Features”- Quick Access: Click to switch between chats instantly
- Visual Indicators: Project colors and status indicators
- Expandable Groups: Collapse/expand date groups and favorites
- Search Highlighting: Visual feedback for search matches
- Content Previews: See matching message snippets in search results
Organization Features
Section titled “Organization Features”- Date-Based Organization: Automatic grouping by time periods
- Project Association: Link chats to specific projects
- Favorites Priority: Important chats always accessible at top
- Flexible Filtering: Combine search with project filters
- Smart Sorting: Most recent chats appear first
Best Practices
Section titled “Best Practices”Organizing Chats
Section titled “Organizing Chats”- Use Descriptive Names: Rename chats with meaningful titles for easy identification
- Favorite Important Chats: Mark frequently accessed chats as favorites
- Regular Cleanup: Delete old or unnecessary chats to keep history manageable
- Project Organization: Associate chats with appropriate projects for better filtering
Searching Effectively
Section titled “Searching Effectively”- Use Specific Terms: More specific search terms yield better results
- Search by Date: Include date information when searching for time-specific chats
- Combine with Filters: Use project filters with search for precise results
- Review Search Badges: Pay attention to color-coded search result badges
Managing Favorites
Section titled “Managing Favorites”- Limit Favorites: Only favorite chats you access regularly to keep the list manageable
- Regular Review: Periodically review and unfavorite chats you no longer need
- Quick Access: Use favorites for chats you reference frequently
- Organize by Priority: Favorite the most important chats first
Working with Projects
Section titled “Working with Projects”- Associate Correctly: Ensure chats are linked to the right projects
- Use Project Filters: Filter by active projects to focus on relevant conversations
- Multi-Project Chats: Some chats may span multiple projects
- Clear Filters: Reset project filters when switching contexts
Troubleshooting
Section titled “Troubleshooting”Issue: Chat Not Appearing in History
Section titled “Issue: Chat Not Appearing in History”Solutions:
- Refresh the page to reload chat history
- Check that you’re viewing the correct date group (expand “Older” if needed)
- Verify the chat wasn’t deleted
- Check project filters aren’t excluding the chat
- Try searching for the chat by name
Issue: Search Not Finding Chats
Section titled “Issue: Search Not Finding Chats”Solutions:
- Check your spelling and search terms
- Try searching for part of the chat name instead of full name
- Clear the search and browse manually
- Verify the chat exists and you have access to it
- Check if project filters are excluding the chat
Issue: Cannot Rename Chat
Section titled “Issue: Cannot Rename Chat”Solutions:
- Ensure you’re clicking the three-dot menu, not just the chat name
- Try clicking “Rename” again if the input doesn’t appear
- Check that you’re entering a valid name (not empty)
- Refresh the page if the rename feature seems stuck
- Verify you have permissions to edit the chat
Issue: Favorite Not Saving
Section titled “Issue: Favorite Not Saving”Solutions:
- Wait a moment for the favorite action to complete
- Try favoriting the chat again
- Refresh the page to see if the favorite was saved
- Check that you’re logged into the correct account
- Verify you’re in the correct organization
Issue: Project Filter Not Working
Section titled “Issue: Project Filter Not Working”Solutions:
- Clear the project filter and reapply it
- Verify the projects you’re filtering for exist
- Check that chats are actually associated with those projects
- Refresh the page to reload project associations
- Try selecting different projects to test the filter
Issue: Date Groups Not Expanding
Section titled “Issue: Date Groups Not Expanding”Solutions:
- Click directly on the date group header text
- Try clicking multiple times if the first click doesn’t work
- Refresh the page if groups seem stuck
- Check browser console for JavaScript errors
- Clear browser cache if issues persist
Issue: Auto-Scroll Not Working
Section titled “Issue: Auto-Scroll Not Working”Solutions:
- Verify auto-scroll is enabled for the chat
- Check that you haven’t manually scrolled up (which disables it)
- Scroll to the bottom of the chat to re-enable auto-scroll
- Refresh the page if auto-scroll seems stuck
- Try disabling and re-enabling auto-scroll
Security Notes
Section titled “Security Notes”- Chats are user-specific: You can only see your own chats
- Organization-scoped: Chats are limited to your current organization
- Project permissions: Chat visibility may be affected by project access permissions
- Share links: Shared chat links may have expiration dates or access restrictions
- Deletion is permanent: Deleted chats cannot be recovered